本篇搭配 nuxt v3.15、node v20
為了避免開發者的學習負擔,Nuxt 框架並未內建完整所需的功能。這樣的設計保持核心功能簡潔,同時透過模組系統,簡化了應用程式的擴充過程,提升功能整合的效率。
Nuxt 的開發者都知道,插件(Plugins)跟模組(Modules)都能用來擴充應用程式的功能。不過比起插件,模組的使用方式更簡單,因模組已經將套件邏輯封裝好,與 Nuxt 應用整合。Nuxt Modules 提供許多 Nuxt 官方與社群開源的模組,安裝後,只需在 nuxt.config.ts 設定檔配置該模組即可使用。
本篇文章針對進階開發者,逐步解析模組的設計方式,以及如何將模組封裝並發布供專案或團隊使用,豐富應用程式功能。
步驟拆解
Step1:建立模組
- 1-1:調整 CI Pipeline
- 1-2:實作模組功能
- 1-3:功能測試
Step2:將模組儲存在 GitLab 儲存庫
Step3:使用 GitLab Package Registry 發布 npm 套件
- 3-1:更新 .npmrc
- 3-2:更新 package.json
- 3-3:發布套件
Step4:在專案內安裝使用模組
接下來以一個簡單的按鈕模組來進行說明。
Step1:建立模組
首先打開終端機,輸入指令來建立模組,將 custom-button 替換為自己的模組名稱:
npx nuxi init -t module custom-button
|
安裝完成後,在 VS Code 或其他 IDE 開啟專案,可以看到如下的目錄結構:
custom-button/
|—— .github/
|—— .vscode/
|—— node_modules/
|—— playground/
|—— src/
|—— test/
|—— .gitignore
|—— .npmrc
|—— eslint.config.mjs
|—— package.json
|—— tsconfig.json
|
1-1:調整 CI Pipeline
.github/workflows/ci.yml 是用於 GitHub 儲存庫的 CI(自動整合)配置檔案。在這裡,我們要部署到 GitLab 儲存庫,因此將該檔案移除,並新增 .gitlab-ci.yml 作為 GitLab CI/CD Pipeline 的設定檔案。
- |—— .github/
+ |—— .gitlab-ci.yml
|
stages:
- lint
- test
lint:
stage: lint
image: node:20
script:
- corepack enable
- npx nypm@latest i
- npm run lint
only:
- main
test:
stage: test
image: node:20
script:
- corepack enable
- npx nypm@latest i
- npm run dev:prepare
- npm run test
only:
- main
|
1-2:實作模組功能
開始之前,執行以下指令,建立開發所需的檔案:
模組的原始碼定義在 src 目錄,主要設定檔為 module.ts。模組的作用範圍為建置階段與伺服器啟動階段,執行階段(Runtime)不會重複運行,執行階段所需的資源需放在 runtime/ 目錄,例如:Vue 元件、組合式函式、插件、API 路由、樣式表、靜態資源等。這些內容由模組在建置階段注入應用,並在執行階段由應用程式載入,確保運行時能正確使用這些資源。
|—— src/
  |—— runtime/
    |—— coponents/
      |—— Button.vue
  |—— module.ts
|
首先在 module.ts 使用 @nuxt/kit 提供的方法來建立模組。
常用方法:
defineNuxtModule:建立模組createResolver:用來解析路由,簡化相對路徑的處理addPlugin:注入插件addComponent:注入元件addImports / addImportsDir:注入組合式函式addServerHandler:注入伺服器路由
import { defineNuxtModule } from '@nuxt/kit';
export default defineNuxtModule({
meta: {
name: 'custom-button',
configKey: 'customButton',
compatibility: {
nuxt: '>=3.13.0'
}
},
defaults: {},
hooks: {},
setup(moduleOptions, nuxt) {
}
});
|
建立一個按鈕元件 src/components/Button.vue,設定樣式與傳遞的參數:
<template>
<button type="button" class="button" :disabled="isDisabled" @click="handleClick"
:style="`--color: ${customButton[btnStyle] || customButton.primary}`">
<span class="text">{{ text }}</span>
</button>
</template>
<script setup>
import { useRuntimeConfig } from '#imports';
defineProps({
text: {
type: String,
required: true,
default: ''
},
btnStyle: {
type: String,
default: ''
},
isDisabled: {
type: Boolean,
default: false
}
});
const emit = defineEmits(['click']);
const handleClick = () => {
emit('click');
};
const customButton = useRuntimeConfig().public.customButton;
</script>
<style scoped>
.button {
border-radius: 50rem;
padding: 0.5rem 1rem;
margin-right: 0.5rem;
border: 0;
color: var(--color);
background-color: var(--color);
}
.text {
color: currentColor;
filter: grayscale(1) contrast(999) invert(1);
}
.button:disabled {
background-color: darkgrey;
pointer-events: none;
}
.button:hover {
filter: brightness(90%);
}
</style>
|
接下來回到模組,使用 addComponent 注入元件。
import { defineNuxtModule, createResolver, addComponent } from '@nuxt/kit';
import { defu } from 'defu';
export default defineNuxtModule({
meta: {
name: 'custom-button',
configKey: 'customButton',
compatibility: {
nuxt: '>=3.13.0'
}
},
defaults: {
primary: '#0058ff',
secondary: '#ecca0b',
success: '#42b983',
danger: '#e53e3e'
},
hooks: {},
setup(moduleOptions, nuxt) {
const { resolve } = createResolver(import.meta.url);
nuxt.options.runtimeConfig.public.customButton = defu(
nuxt.options.runtimeConfig.public.customButton,
moduleOptions
);
addComponent({
name: 'CustomButton',
filePath: resolve('runtime/components/Button')
});
}
});
|
1-3:功能測試
接下來可以在 playground/ 與 text/ 目錄測試功能和調整。playground/ 模擬一個實際的 Nuxt 應用程式並配置好模組,我們可以在此測試功能和調整;text/ 則用來撰寫單元測試。
|—— playground/
  |—— app.vue
  |—— nuxt.config.ts
  |—— ...
|—— test/
|
開啟 nuxt.config.ts 設定檔,可以看到模組已經配置完成,myModule 是預設的模組選項的 key,需調整為 src/module.ts 設定的 configKey,這裡改為 customButton:
export default defineNuxtConfig({
  modules: ['../src/module'],
  - myModule: {},
  + customButton: {},
  devtools: { enabled: true },
})
|
以上完成之後,開啟 app.vue 來測試元件功能。
<template>
  <div>
    <h1>Nuxt module playground!</h1>
    <CustomButton text="Click Me!" btn-style="primary" @click="sayHello()" />
    <CustomButton text="Click Me!" btn-style="secondary" />
    <CustomButton text="Success" btn-style="success" />
    <CustomButton text="Danger" btn-style="danger" />
    <CustomButton text="Disabled" disabled />
  </div>
</template>

<script setup>
const sayHello = () => {
  console.log('Hello!');
};
</script>

<style scoped>
:deep(button) {
  display: block;
  margin-bottom: 0.5rem;
}
</style>
|
執行以下指令後開啟瀏覽器 http://localhost:3000/,若能順利看到元件,模組的部分就完成了!
Step2:將模組儲存在 GitLab 儲存庫
開啟 GitLab,先申請一個帳號,登入後在首頁右上角點擊 New project → Create blank project 新增一個空的專案,接著設定專案名稱、選擇私有專案,最後點擊 Create project。
在剛才建立的專案內,複製以下指令。
回到本地模組專案,開啟 VS Code 終端機,先將本地的變更提交到版本控制,然後執行推送指令。在執行 git push -uf origin main 可能會拋錯:
remote: GitLab: You are not allowed to force push code to a protected branch on this project.
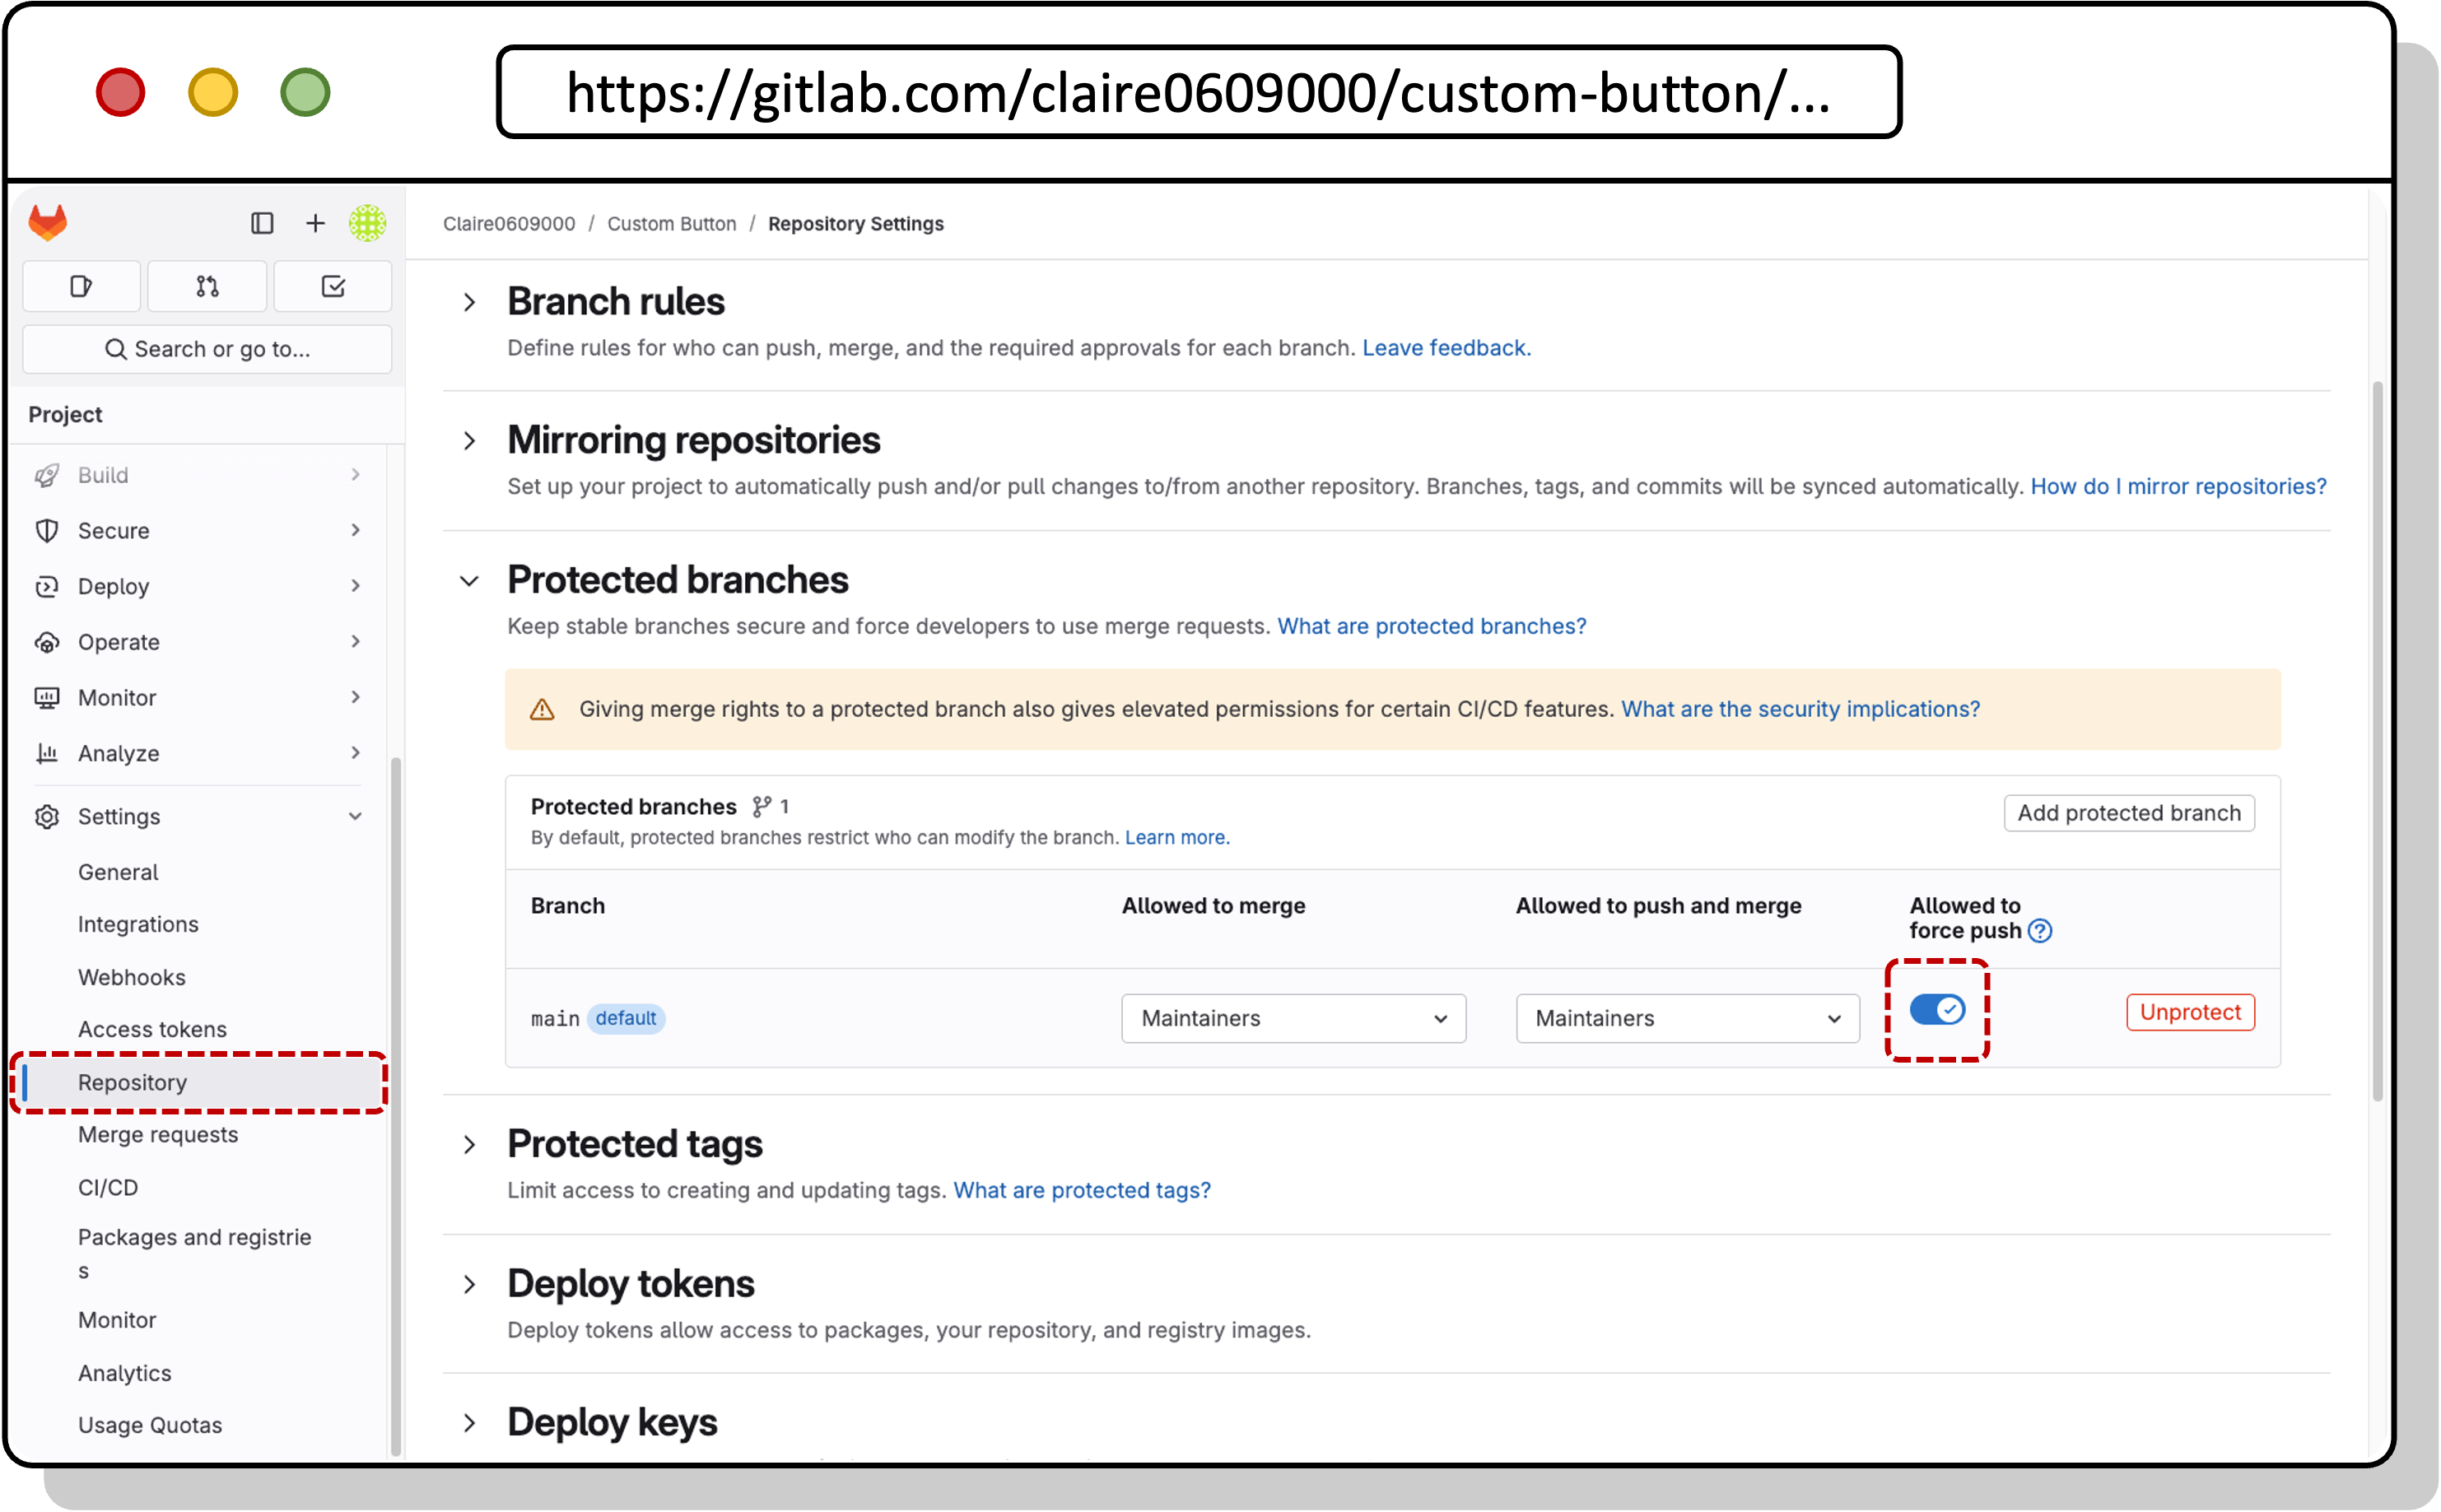
這是因為 GitLab 預設會保護 main 分支,在 GitLab 專案左側選單選擇 Settings → Repository → Protected branches,main 分支開啟 Allowed to force push。接著回到本地模組再次執行指令,就會成功了。
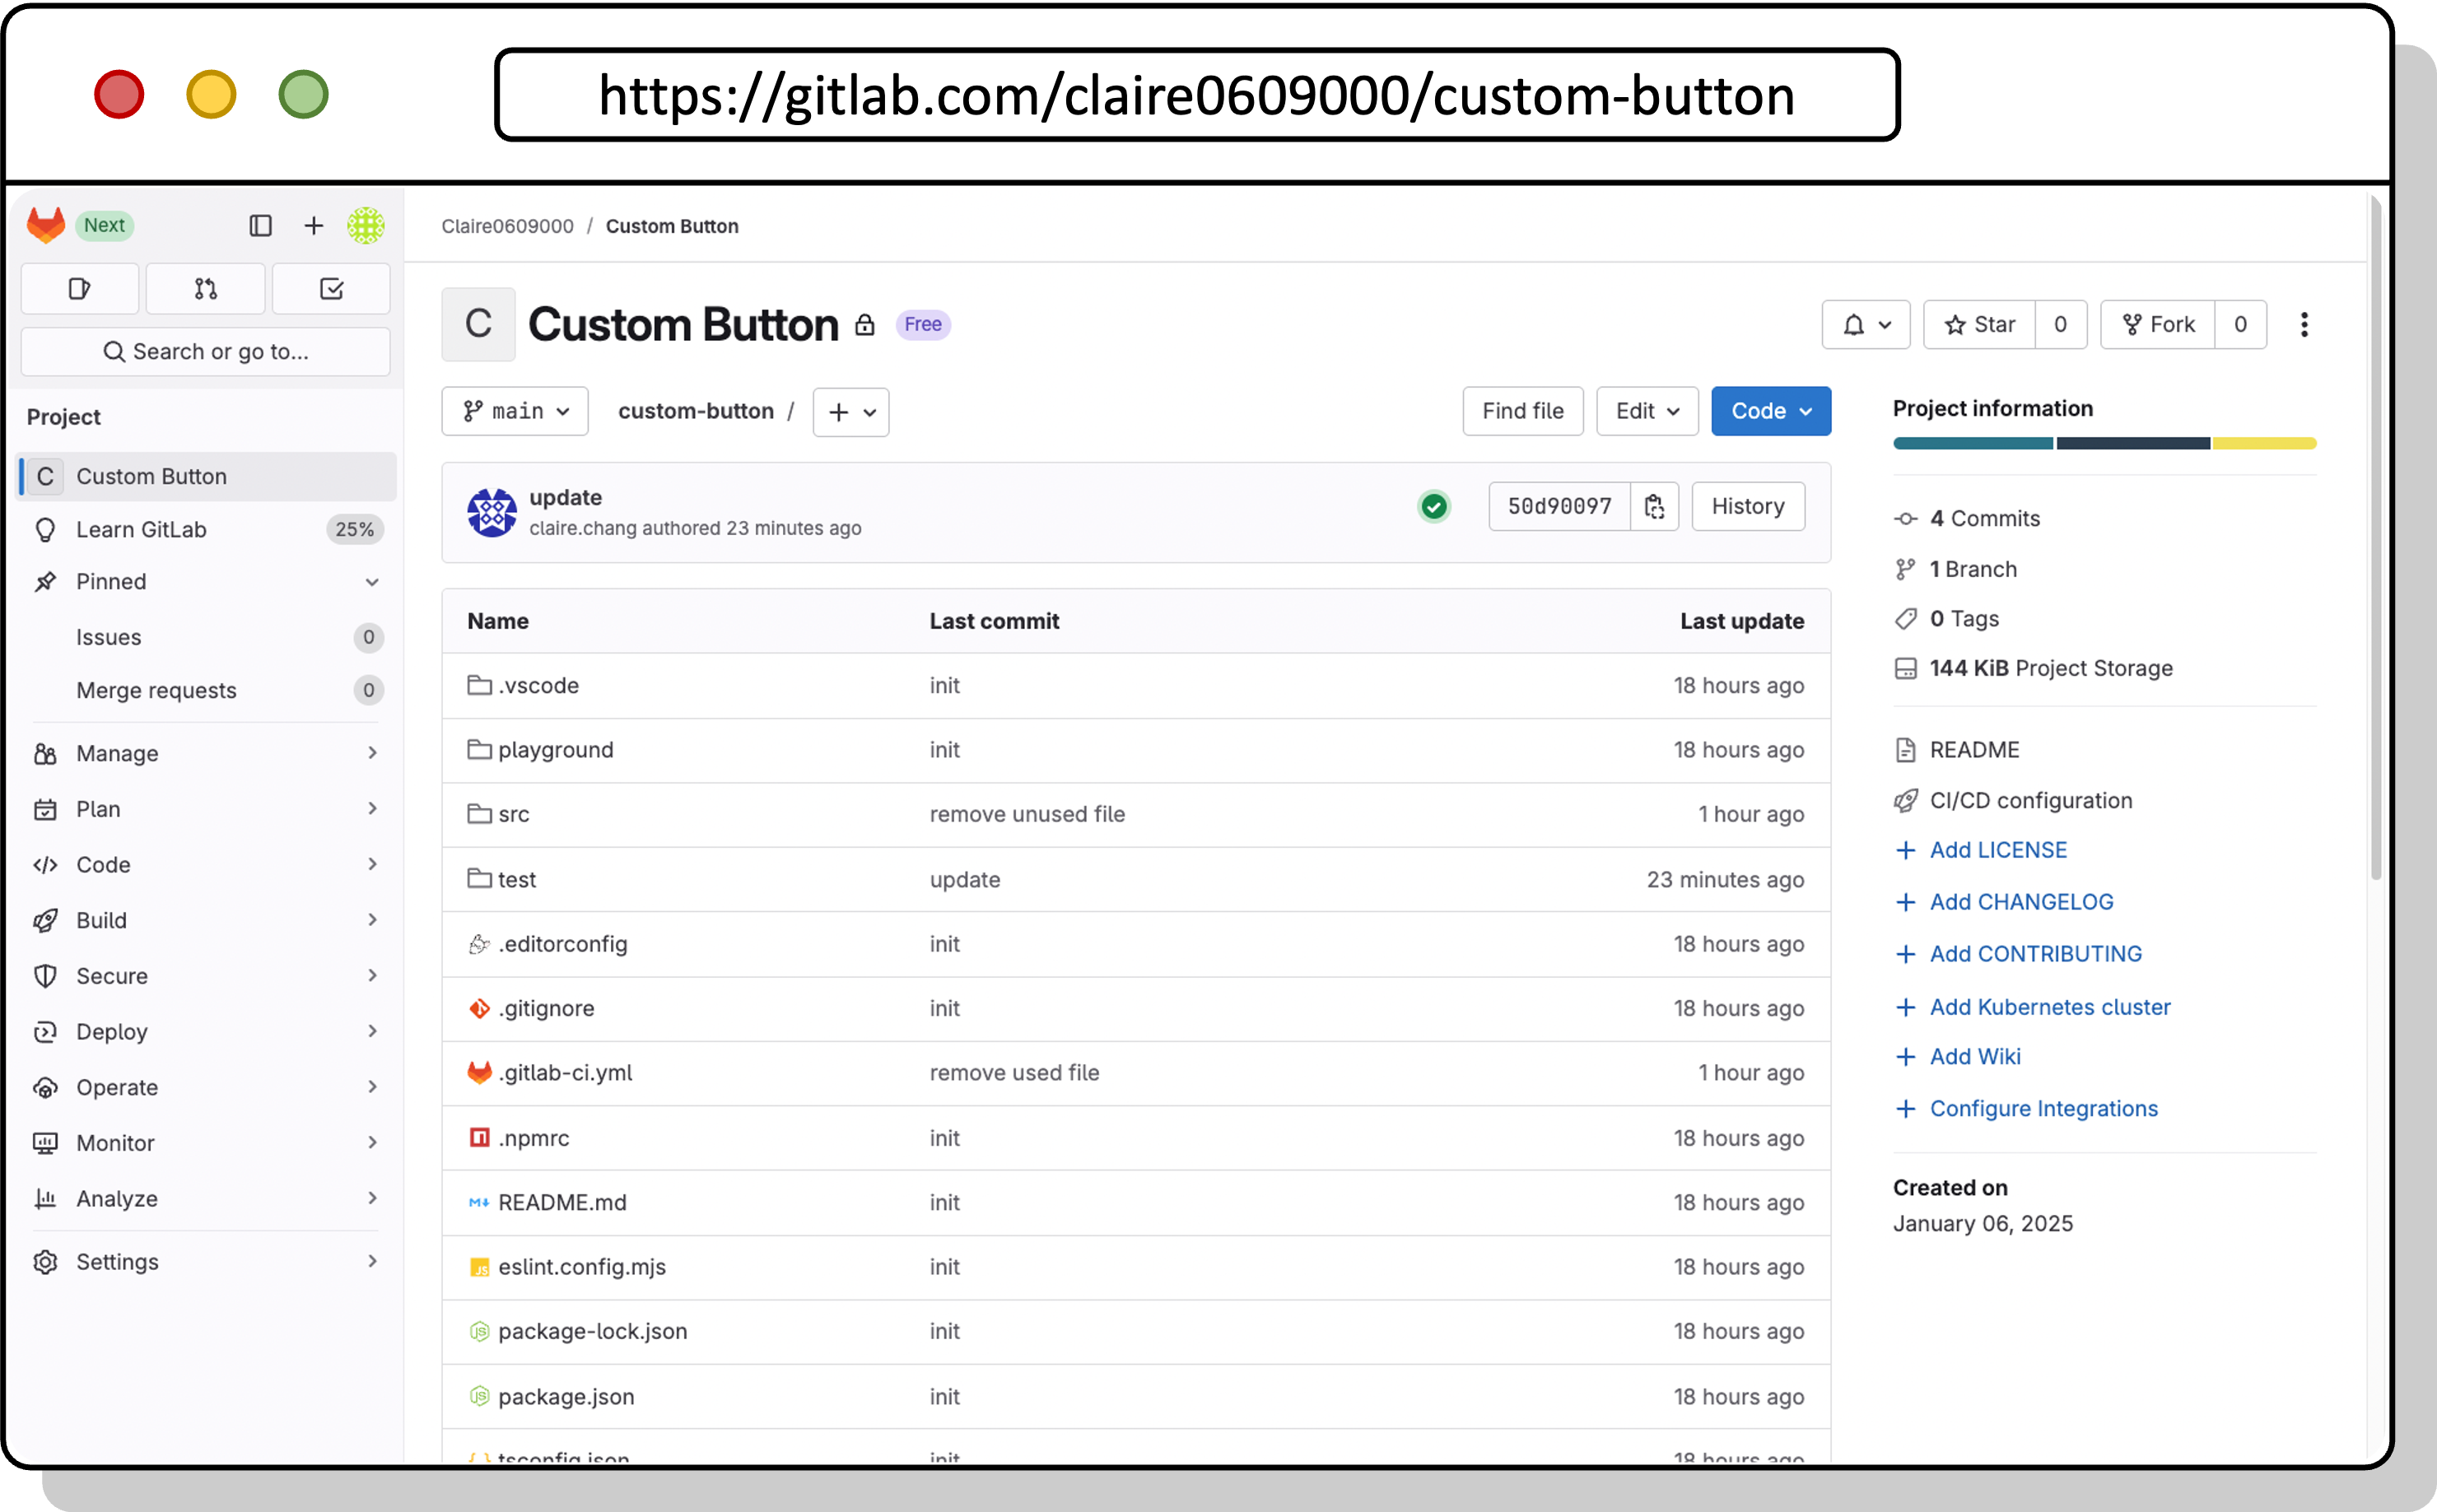
推送完成後,可以在 GitLab 儲存庫中查看模組的內容。
Step3:使用 GitLab Package Registry 發布 npm 套件
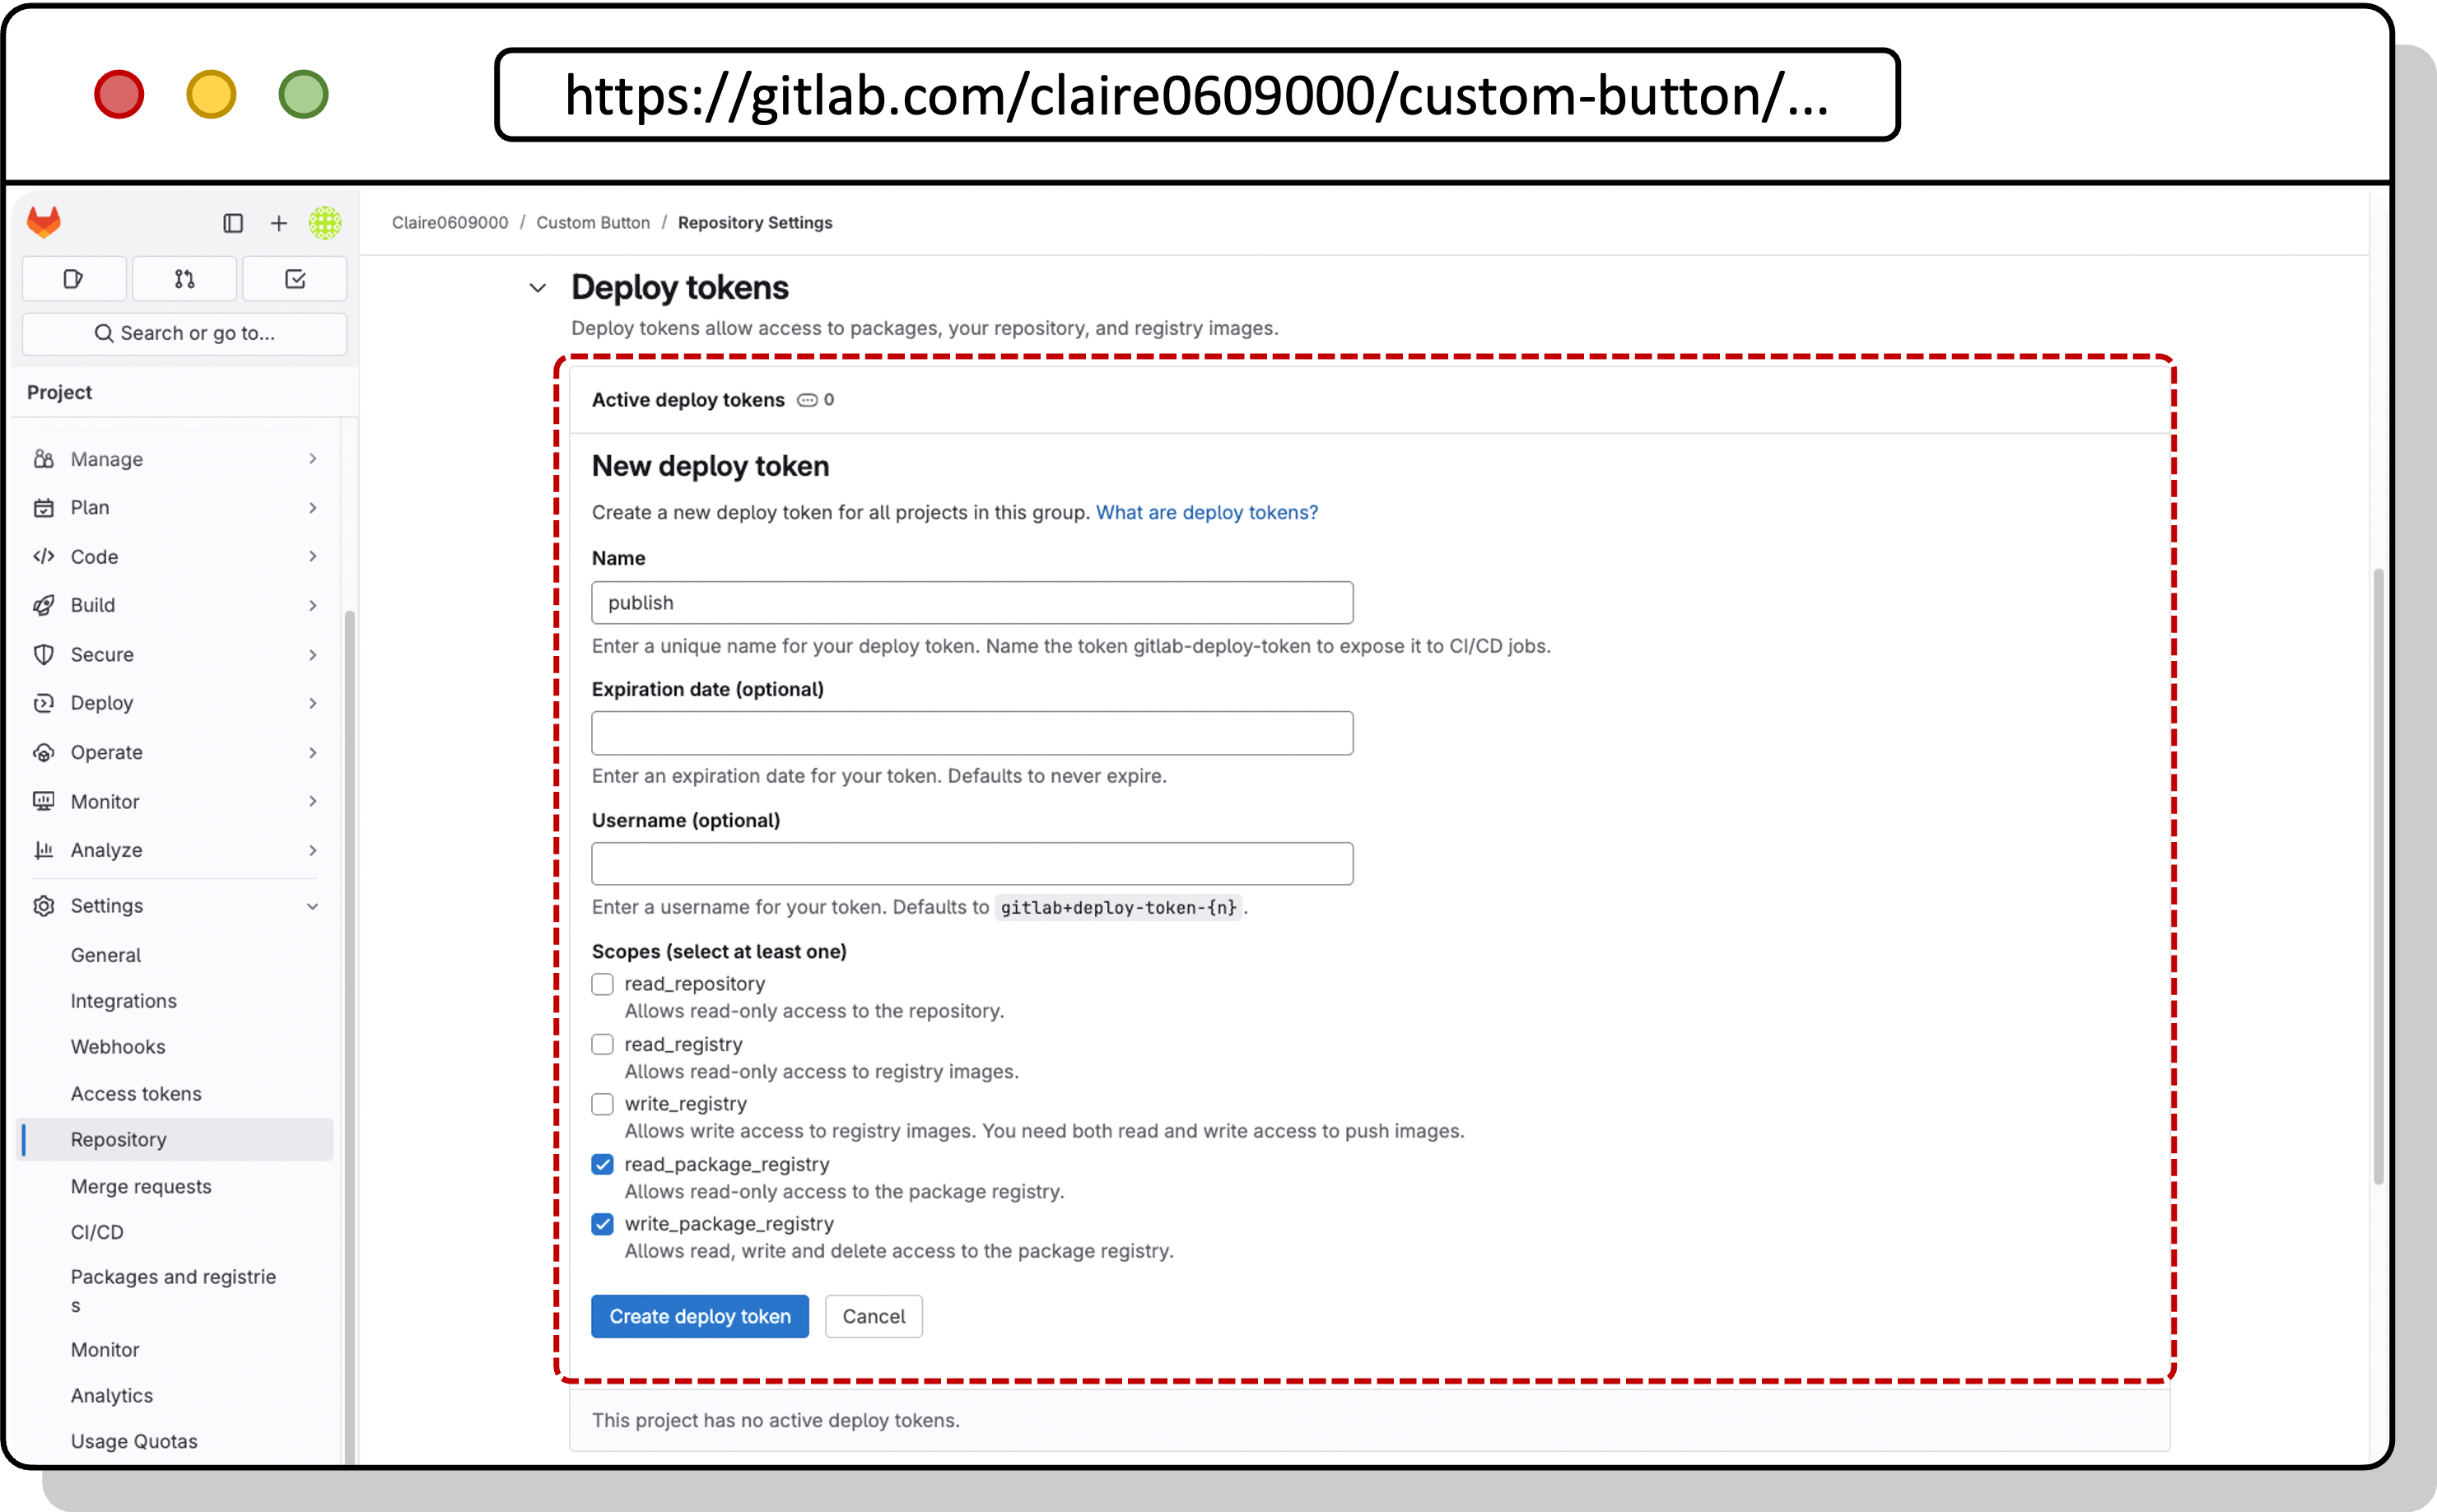
GitLab 專案左側選單選擇 Settings → Repository → Deploy Tokens,建立一組 Token,Scopes 需選擇 read_package_registry 與 write_package_registry,記得記下來。
3-1:更新 .npmrc
回到本地專案,開啟 .npmrc,加入以下內容:
@scope:套件託管的根目錄,需為 @ 開頭,本篇範例建立在我的個人目錄,因此為 @claire0609000domain_name:GitLab 專案所在 domain,在這裡為 gitlab.comproject_id:GitLab 專案 idNPM_TOKEN:前一步驟申請的 Token,不建議直接寫死,避免加入版控
@<scope>:registry=https://<domain_name>/api/v4/projects/<project_id>/packages/npm/
//<domain_name>/api/v4/projects/<project_id>/packages/npm/:_authToken="${NPM_TOKEN}"
|
調整後如下:
@claire060900:registry=https://gitlab.com/api/v4/projects/1234567/packages/npm/

//gitlab.com/api/v4/projects/1234567/packages/npm/:_authToken="${NPM_TOKEN}"
|
3-2:更新 package.json
接下來調整 package.json 的套件名稱(需加上 scope)以及發布設定(publishConfig)。
{
  "name": "@<scope>/<package>",
  "version": "1.0.0",
  "publishConfig": {
    "@<scope>:registry": "https://<domain_name>/api/v4/projects/<project_id>/packages/npm/"
  }
	...
}
|
調整後如下:
{
  "name": "@claire060900/custom-button",
  "version": "1.0.0",
  "publishConfig": {
    "@<scope>:registry": "https://gitlab.com/api/v4/projects/1234567/packages/npm/"
  }
	...
}
|
3-3:發布套件
萬事俱備後,執行以下指令進行發布,<token> 前面申請的 Token:
NPM_TOKEN=<token> npm run release
|
npm run release 會執行以下:
npm run lint 進行程式碼檢核npm run test 執行測試npm run prepack 打包模組- 根據 commit 訊息自動判斷版本並更新
package.json 中的版本號
- 更新
CHANGELOG.md 文件
- 將模組發佈到 npm registry
- 產生對應版本的
git tag 並推送到遠端儲存庫
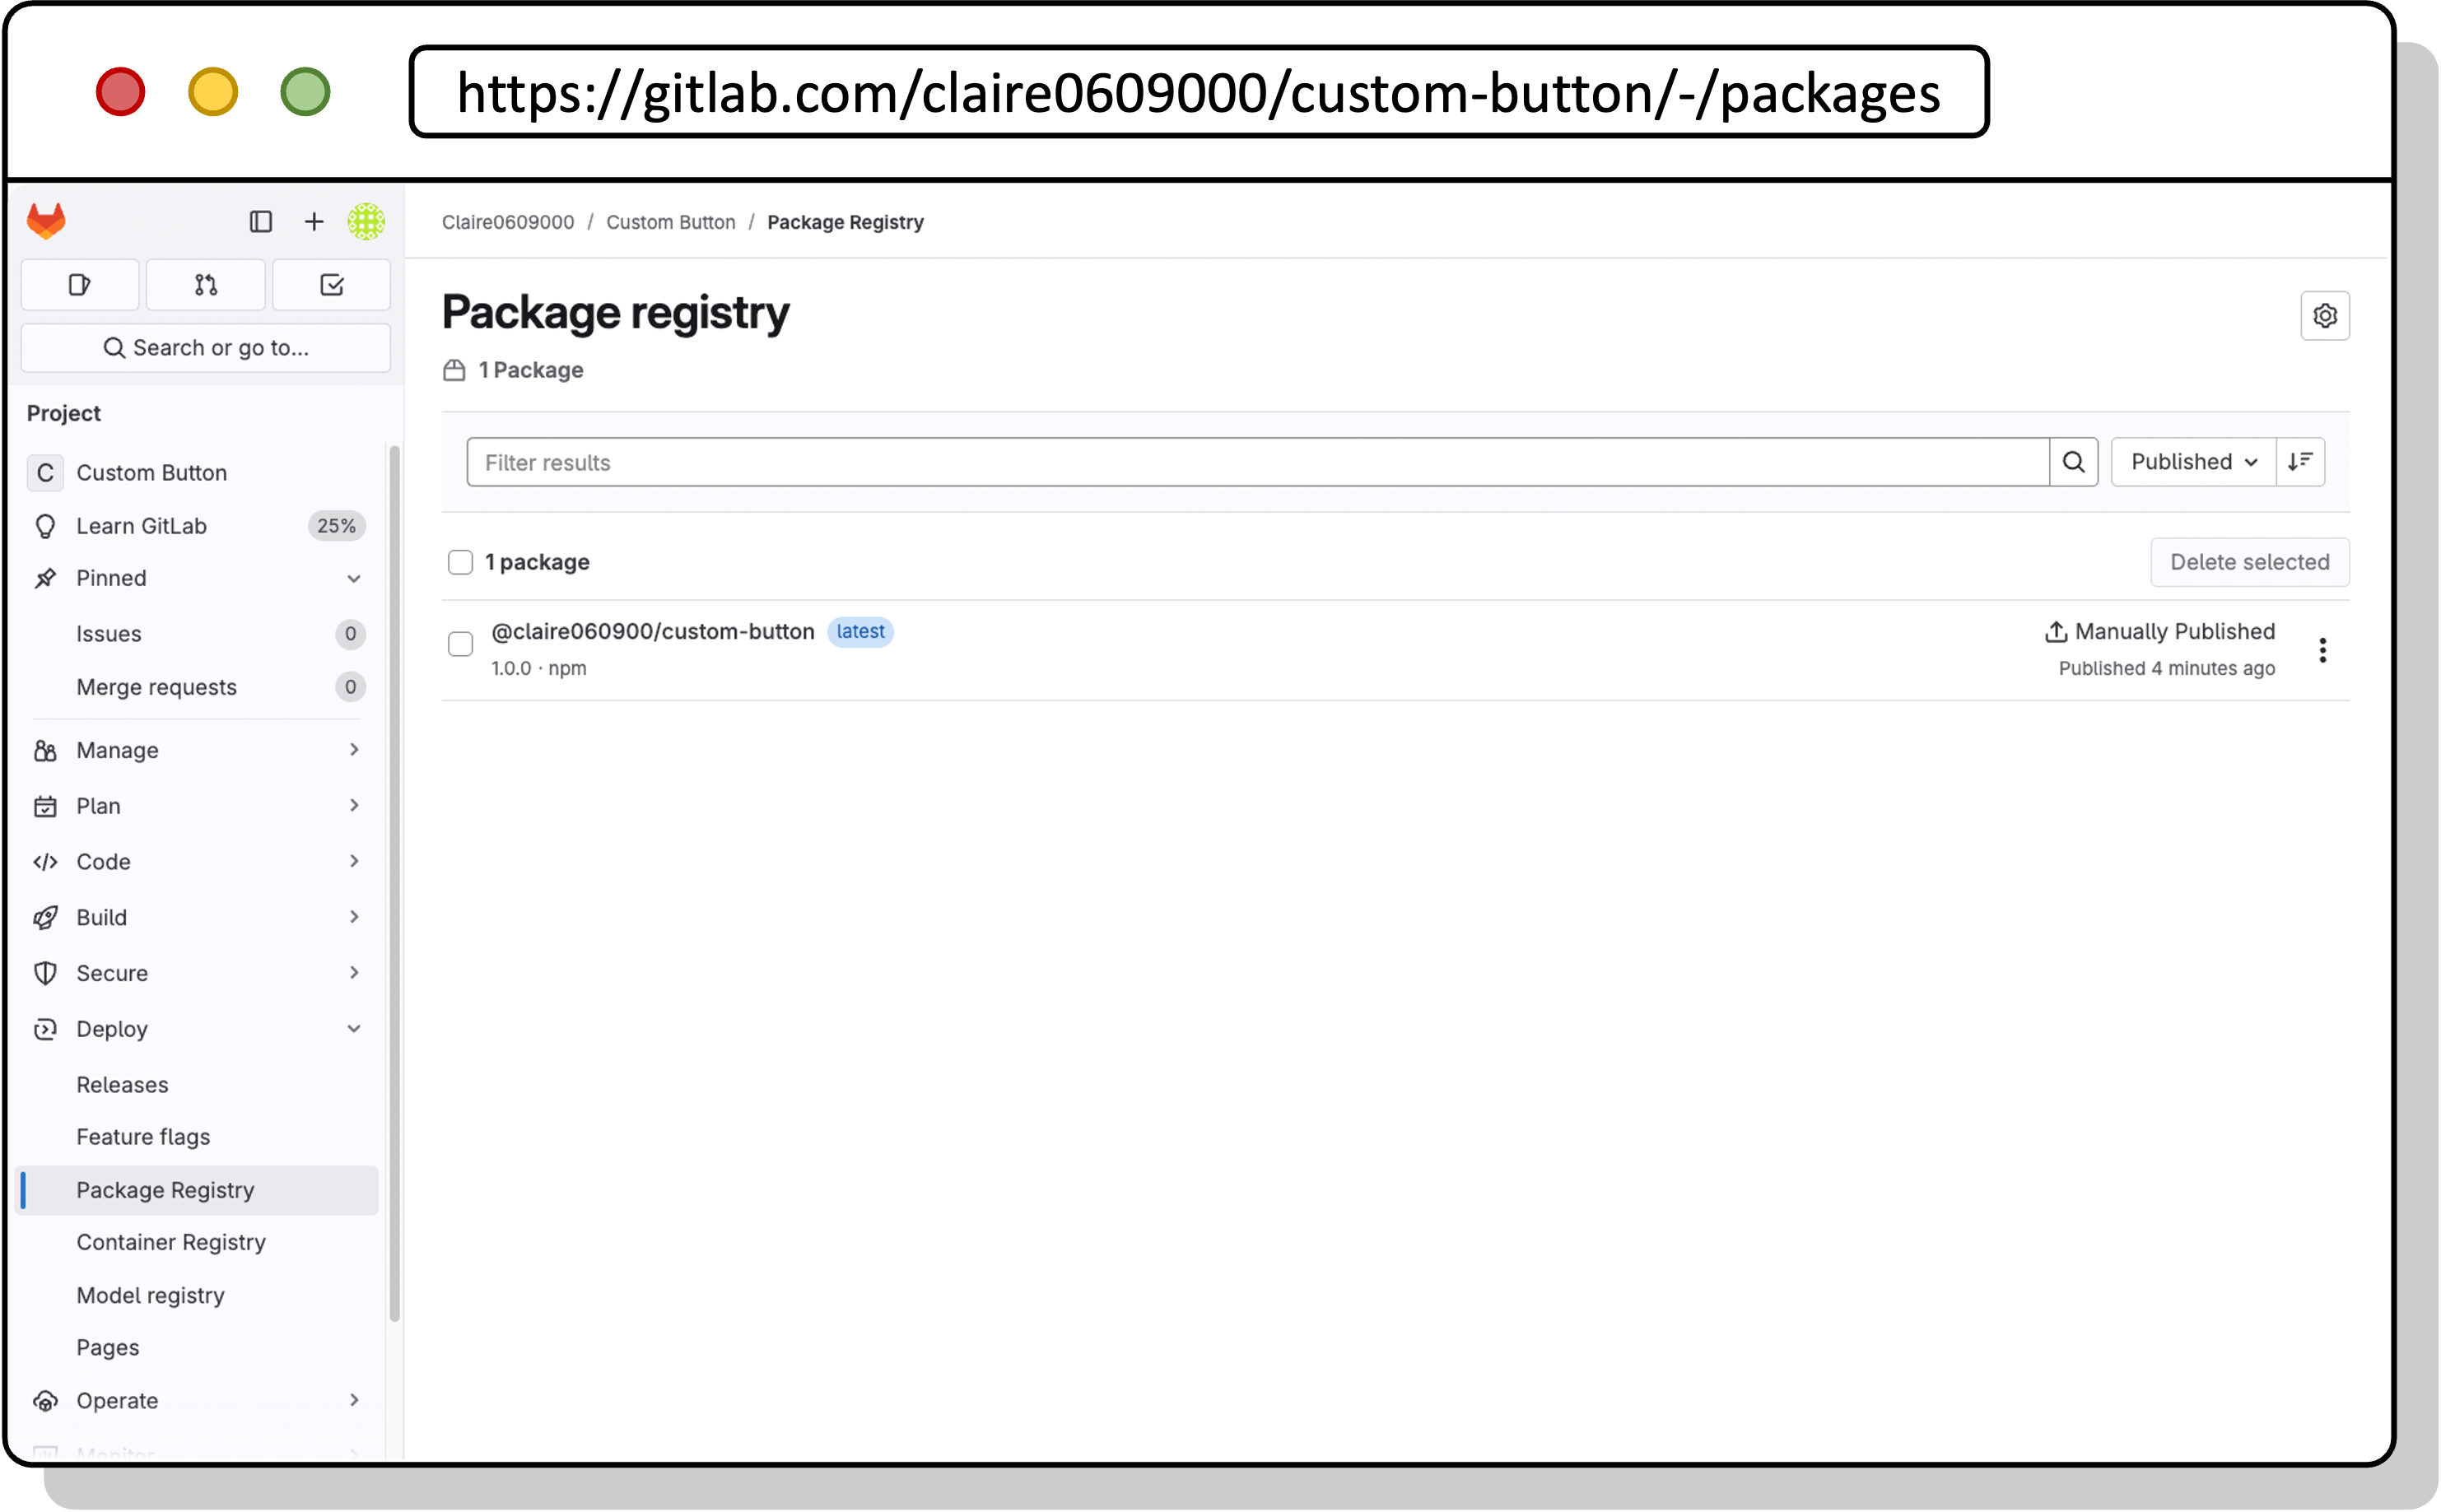
收到成功訊息後,回到 GitLab 專案,左側選單選擇 Deploy → Package Registry,若能看到剛才發布的套件,恭喜大功告成!
NOTE:
後續若更新套件,每次發布新版本時,記得在 package.json 更新版本號。
Step4:在專案內安裝使用模組
模組封裝並發布為套件後,接下來就可以跨專案安裝使用。在 Nuxt3 專案根目錄加入 .npmrc 檔,內容同 Step3。
@<scope>:registry=https://<domain_name>/api/v4/projects/<project_id>/packages/npm/

//<domain_name>/api/v4/projects/<project_id>/packages/npm/:_authToken="${NPM_TOKEN}"
|
安裝模組,<token> 替換為 Step3 申請的 Token。
NPM_TOKEN=<token> npm install @claire060900/custom-button
|
在 package.json 查看安裝的模組:
{
  "dependencies": {
    "@claire060900/custom-button": "^1.0.0"
    ...
  }
}
|
接著就可以在 nuxt.config.ts 配置模組與調整選項:
export default defineNuxtConfig({
  modules: [
    '@claire060900/custom-button'
  ],
  customButton: {
    primary: '#20b2aa',
    secondary: '#ffa07a'
  }
});
|
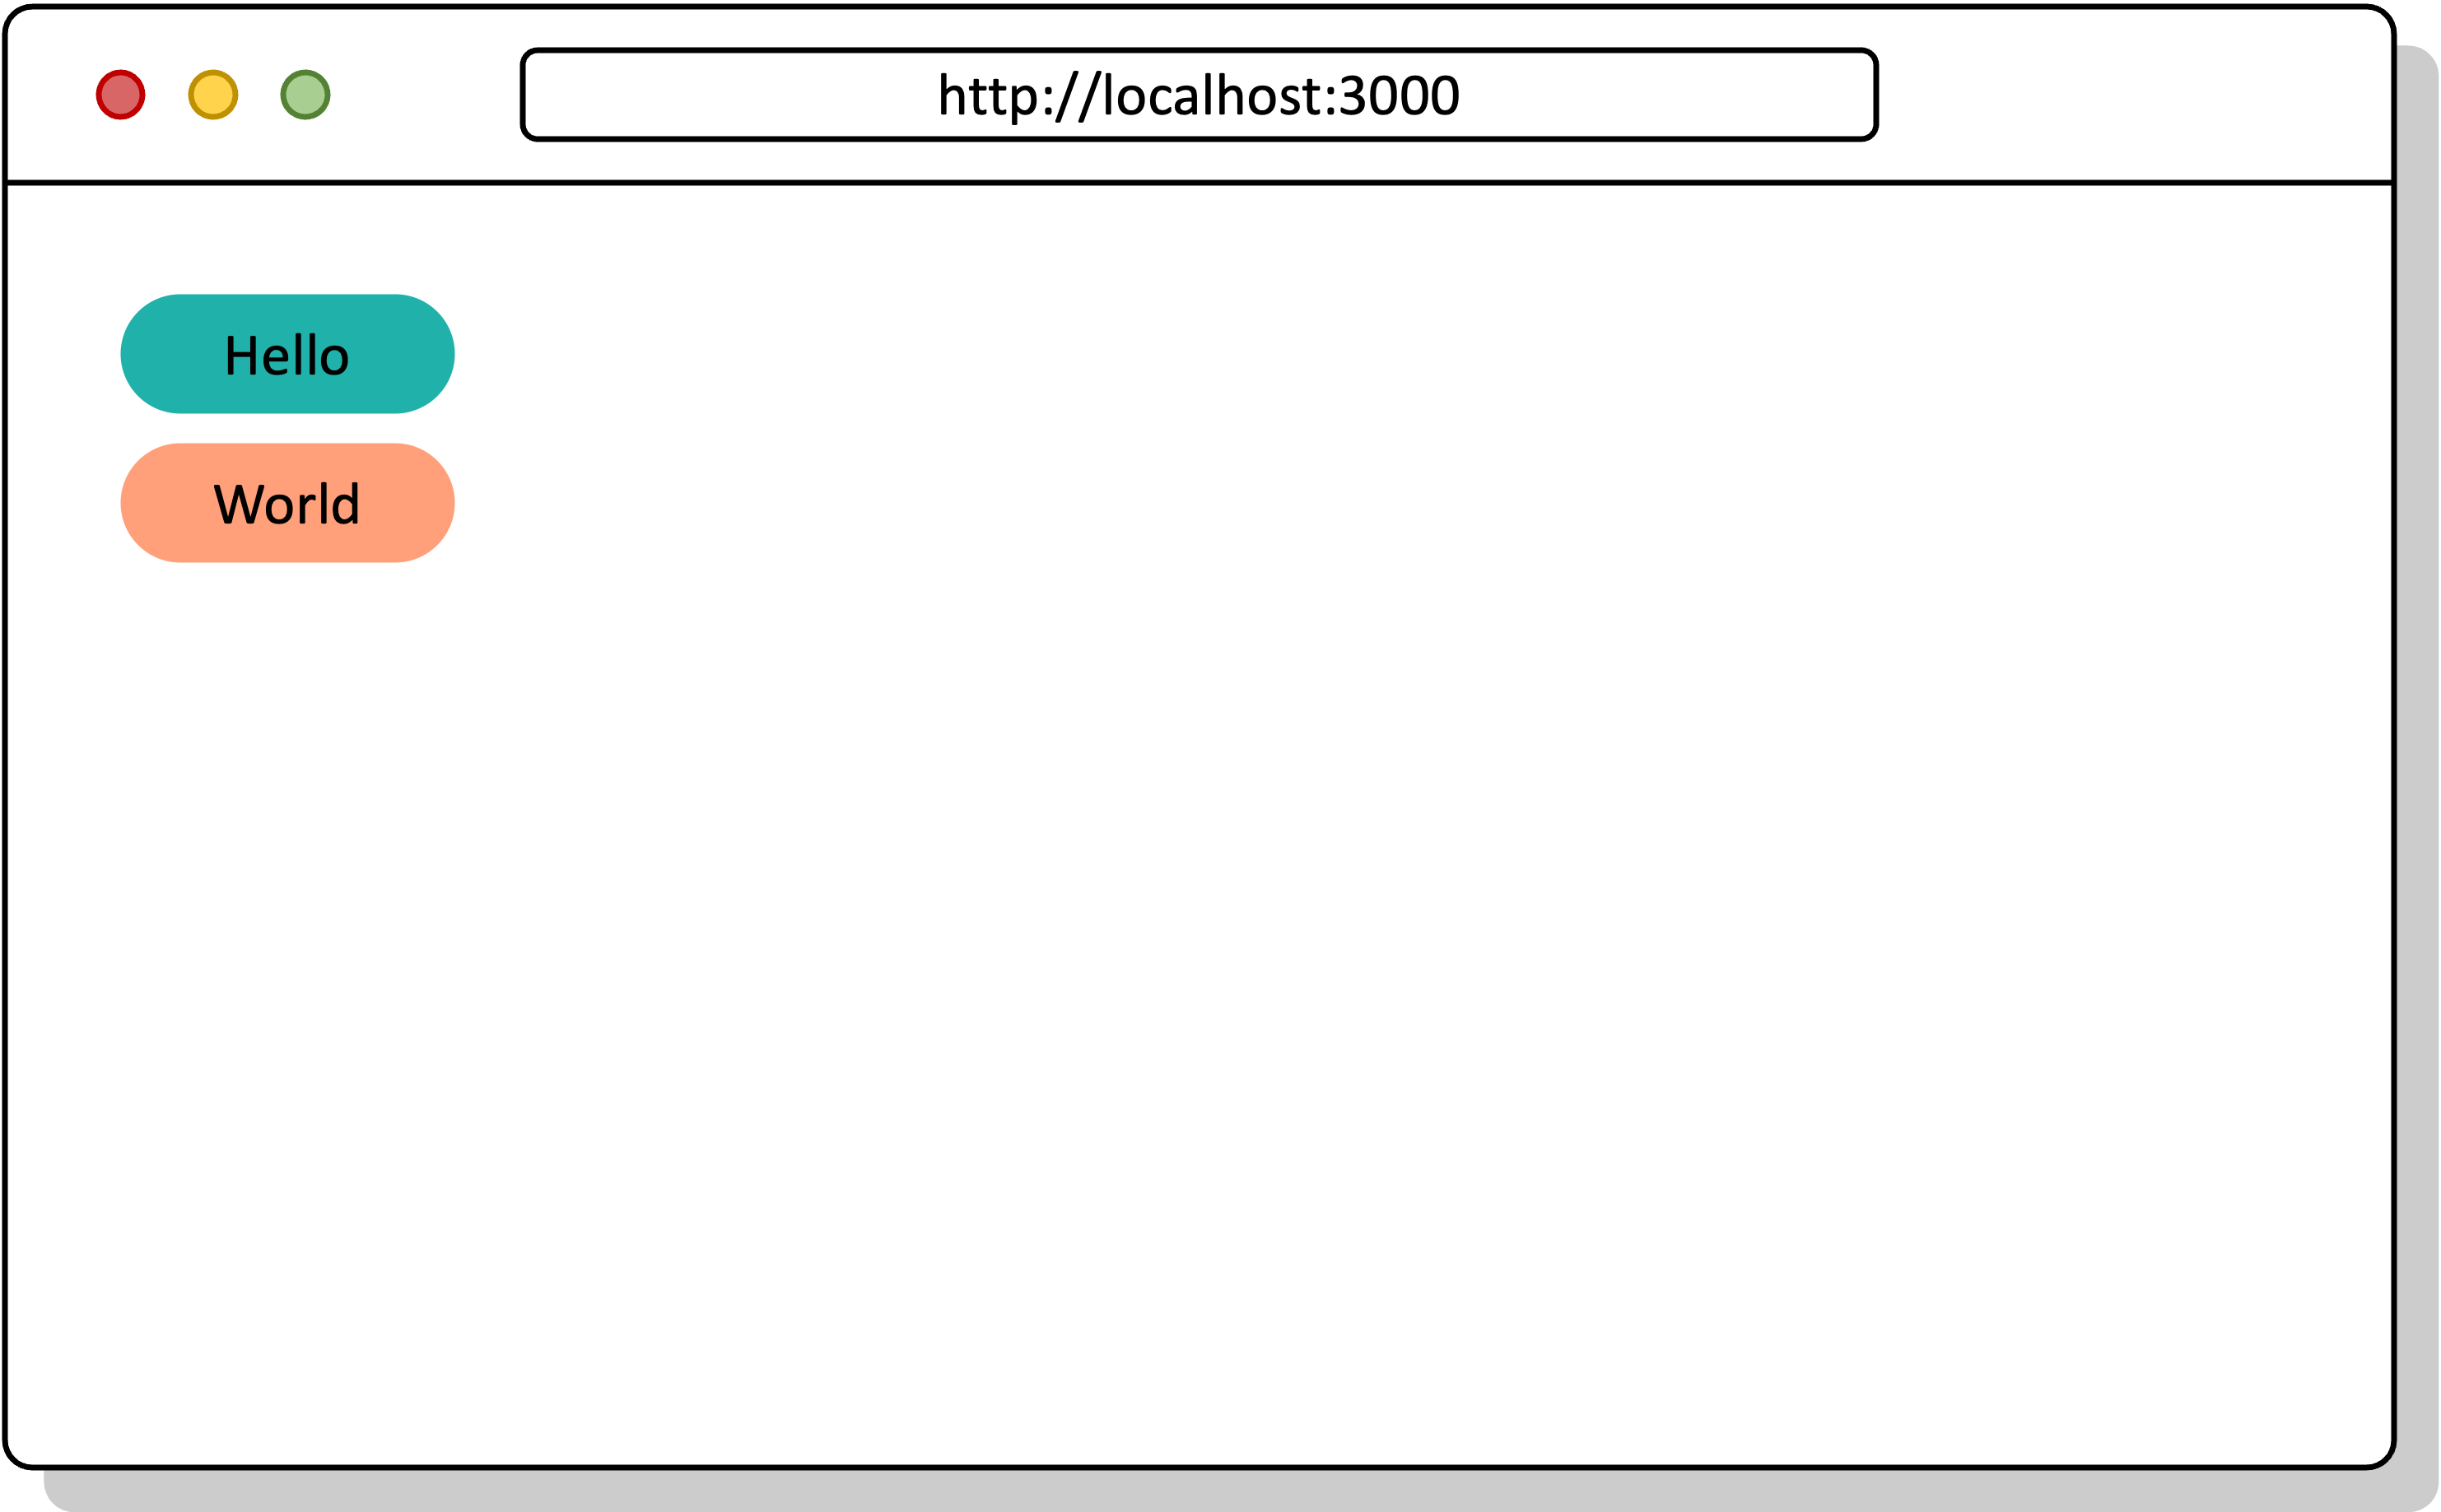
試著在頁面上使用元件:
<template>
  <div>
    <CustomButton text="Hello" btn-style="primary" />
    <CustomButton text="World" btn-style="secondary" />
  </div>
</template>

<style scoped>
:deep(button) {
  display: block;
  margin-bottom: 0.5rem;
}
</style>
|
參考資源:
https://nuxt.com/docs/guide/going-further/modules
https://notes.boshkuo.com/blog/gitlab-package-registry



評論